Apr 28, 2026 | 468 words | 5 min read
15.1.1. Materials#
Pillow (PIL)#
PIL stands for the Python Imaging Library and adds image processing
capabilities to python.
Here is the link to the Official Documentation on
PIL
Installing PIL#
You can install PIL using either uv or pip. If you
installed Python on your system using uv, use uv to
install additional packages. If you installed Python using another method,
you can use pip to install packages. Here are the terminal commands needed
for both methods:
uv add Pillow
python3 -m pip install Pillow
Important submodules#
We will primarily be using these submodules for this class:
from PIL import Image
from PIL import ImageOps
Read more about the functionalities of these submodules in the Image
documentation and
ImageOps
documentation.
Opening an Image File:#
You can open an image file using the Image.open() function. Note that this
does not return a NumPy array, but a PIL image object. However, you can
convert it to a NumPy array.
from PIL import Image
import numpy as np
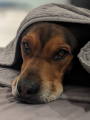
image = Image.open('beau.png')
print(type(image)) # Output: <class 'PIL.PngImagePlugin.PngImageFile'>
print(image.size) # Output: (width, height)
image_array = np.array(image)
print(type(image_array)) # Output: <class 'numpy.ndarray'>
print(image_array.shape) # Output: (height, width, depth)
<class 'PIL.PngImagePlugin.PngImageFile'>
(90, 120)
<class 'numpy.ndarray'>
(120, 90, 3)
To run this example yourself, you can download the image below and save it in the same directory as your code, or provide your own image file path.

Creating an Image from an array:#
You can use the Image.fromarray() function to create a PIL image
object from a NumPy array. This reverses the process of converting an image to a NumPy
array we saw in the previous example.
from PIL import Image
import numpy as np

# Create a random RGB image array
image_array = np.random.randint(0, 256, (100, 100, 3), dtype=np.uint8)

# Convert the array to a PIL image
image = Image.fromarray(image_array)
print(type(image))  # Output: <class 'PIL.Image.Image'>
<class 'PIL.Image.Image'>
Determining Image Attributes:#
The Image type contains several useful attributes such as the mode (RGB,
RGBA, L, etc.), size (width, height), and format (JPEG, PNG, etc.) of the image.
Explore the documentation to find these attributes.
from PIL import Image
image = Image.open('beau.png')
print(image.mode)   # Output: 'RGB' or 'L' etc.
print(image.size)   # Output: (width, height)
print(image.format) # Output: 'JPEG' or 'PNG' etc.
RGB
(90, 120)
PNG
Resizing Images:#
You can resize an image using the resize() method of the Image
object. This method has a parameter called resample which dictates how new
pixels in the resampled image are created or what happens to the old pixels in the
original image. Some options are:
Image.Resampling.NEAREST- Nearest Neighbor (default)Image.Resampling.BILINEAR- BilinearImage.Resampling.HAMMING- HammingImage.Resampling.BICUBIC- BicubicImage.Resampling.LANCZOS- Lanczos
Read about the different resampling filter methods in the documentation.
from PIL import Image
image = Image.open('beau.png')
resized_image = image.resize((120, 160), resample=Image.Resampling.LANCZOS) # Resizes the image to 120x160 using Lanczos resampling
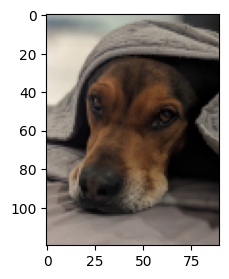
Fig. 15.2 Original Image#
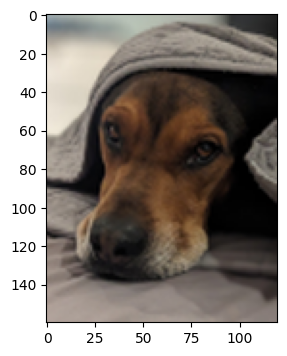
Fig. 15.3 Resized Image#
Padding Images:#
You can pad an image using the ImageOps.pad() function. You must select the
desired color of the padded area and what the shape of the final padded image should be.
If necessary, the original image will be resized to fit within the final padded image
shape.
from PIL import Image, ImageOps
image = Image.open('beau.png')
padded_image = ImageOps.pad(image, (150, 150), color=(255, 0, 0))  # Pads the image to 150x150 with red color
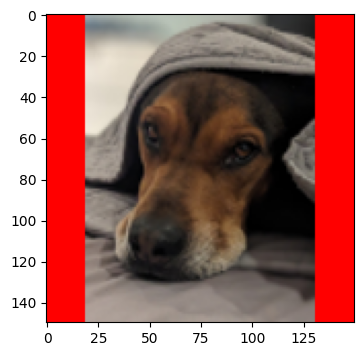
Fig. 15.4 Padded Image#
OpenCV#
OpenCV stands for Open Source Computer Vision Library. Unlike PIL,
which is primarily used for basic image processing tasks, OpenCV is a powerful
library designed for real-time computer vision and image analysis. Hence, it has
several advanced image processing functionalities. Here is the link to the Official
Python Documentation on
OpenCV
Installing OpenCV#
As with the PIL module, you can install OpenCV using either
uv or pip. If you installed Python on your system using
uv, use uv to install additional packages. If you installed
Python using another method, you can use pip to install packages.
Here are the terminal commands needed for both methods:
uv add opencv-python
python3 -m pip install opencv-python
Importing OpenCV#
Even though the package name is opencv-python, it is imported as cv2.
import cv2
import numpy as np
from PIL import Image

# Load an image using PIL
pil_image = Image.open('beau.png')
# Convert PIL image to NumPy array
image_array = np.array(pil_image)

# Convert the RGB image to BGR format for OpenCV
cv_image = cv2.cvtColor(image_array, cv2.COLOR_RGB2BGR)  # Convert RGB to BGR
print(type(cv_image))  # Output: <class 'numpy.ndarray'>
print(cv_image.shape)  # Output: (height, width, 3)

# Convert to grayscale for line detection
gray_image = cv2.cvtColor(cv_image, cv2.COLOR_BGR2GRAY)

# Detect lines using Hough Transform
lines = cv2.HoughLinesP(gray_image, 1, np.pi / 180, threshold=100, minLineLength=50, maxLineGap=10)
print(len(lines))  # Output: Number of detected lines
<class 'numpy.ndarray'>
(120, 90, 3)
48